
If you’re thinking of venturing into the world of candle making, the first and most crucial step is to choose the right supplies. The quality of your supplies will greatly impact the final outcome of your candles. To help you make an informed decision, this guide will provide you with a comprehensive overview of choosing the best candle making supplies in Australia.
Understanding the Basics of Candle Making
Before we delve into the world of candle making supplies, let’s start by understanding the basics. Candle making is an art that has been practiced for centuries. It involves melting wax, adding fragrance oils and dyes, and placing a wick to create a beautiful and scented candle. The process of making candles has evolved over time, with artisans experimenting with different wax blends, scents, and colors to create unique and personalized candles.
Candle making is not only a creative outlet but also a therapeutic activity for many. The soothing process of melting wax, mixing in fragrances, and carefully pouring the hot liquid into molds can be a meditative experience. The satisfaction of seeing a finished candle, ready to light up a room with its warm glow, is truly rewarding.
Types of Candles You Can Make
There are various types of candles you can make, each with its own unique characteristics. Some popular options include pillar candles, container candles, taper candles, votive candles, and tea light candles. Each type requires specific supplies to achieve the desired result. Pillar candles, for example, are versatile and can be molded into different shapes and sizes, while container candles are perfect for beginners as they are easy to make and customize.
Taper candles are elegant and often used for special occasions, while votive candles are small but powerful in scent. Tea light candles, on the other hand, are perfect for creating a cozy atmosphere with their flickering flames. Experimenting with different types of candles can help you discover your preferred style and technique in candle making.
Essential Candle Making Supplies
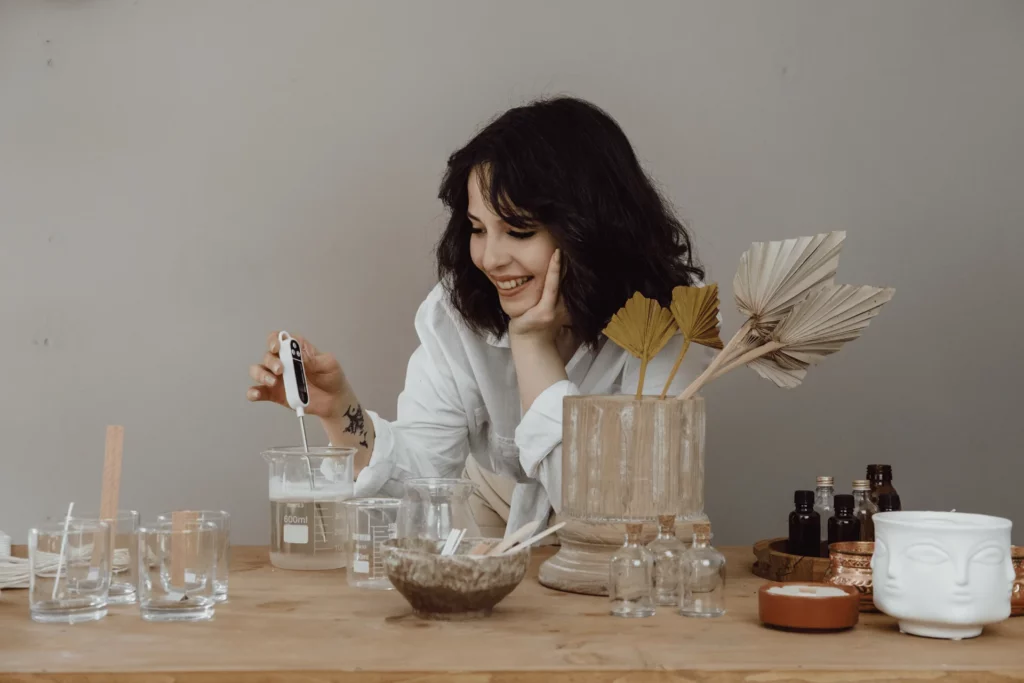
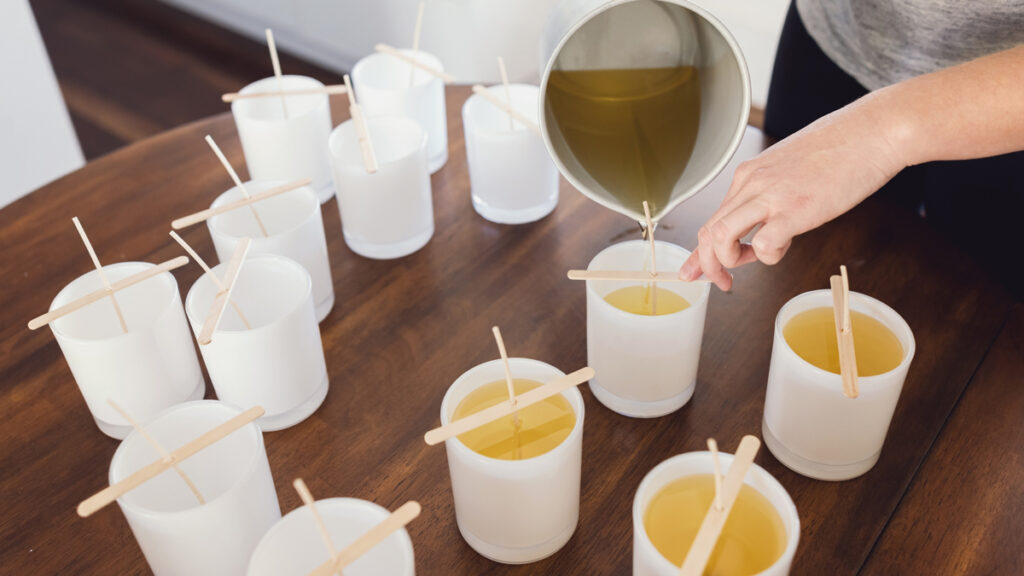
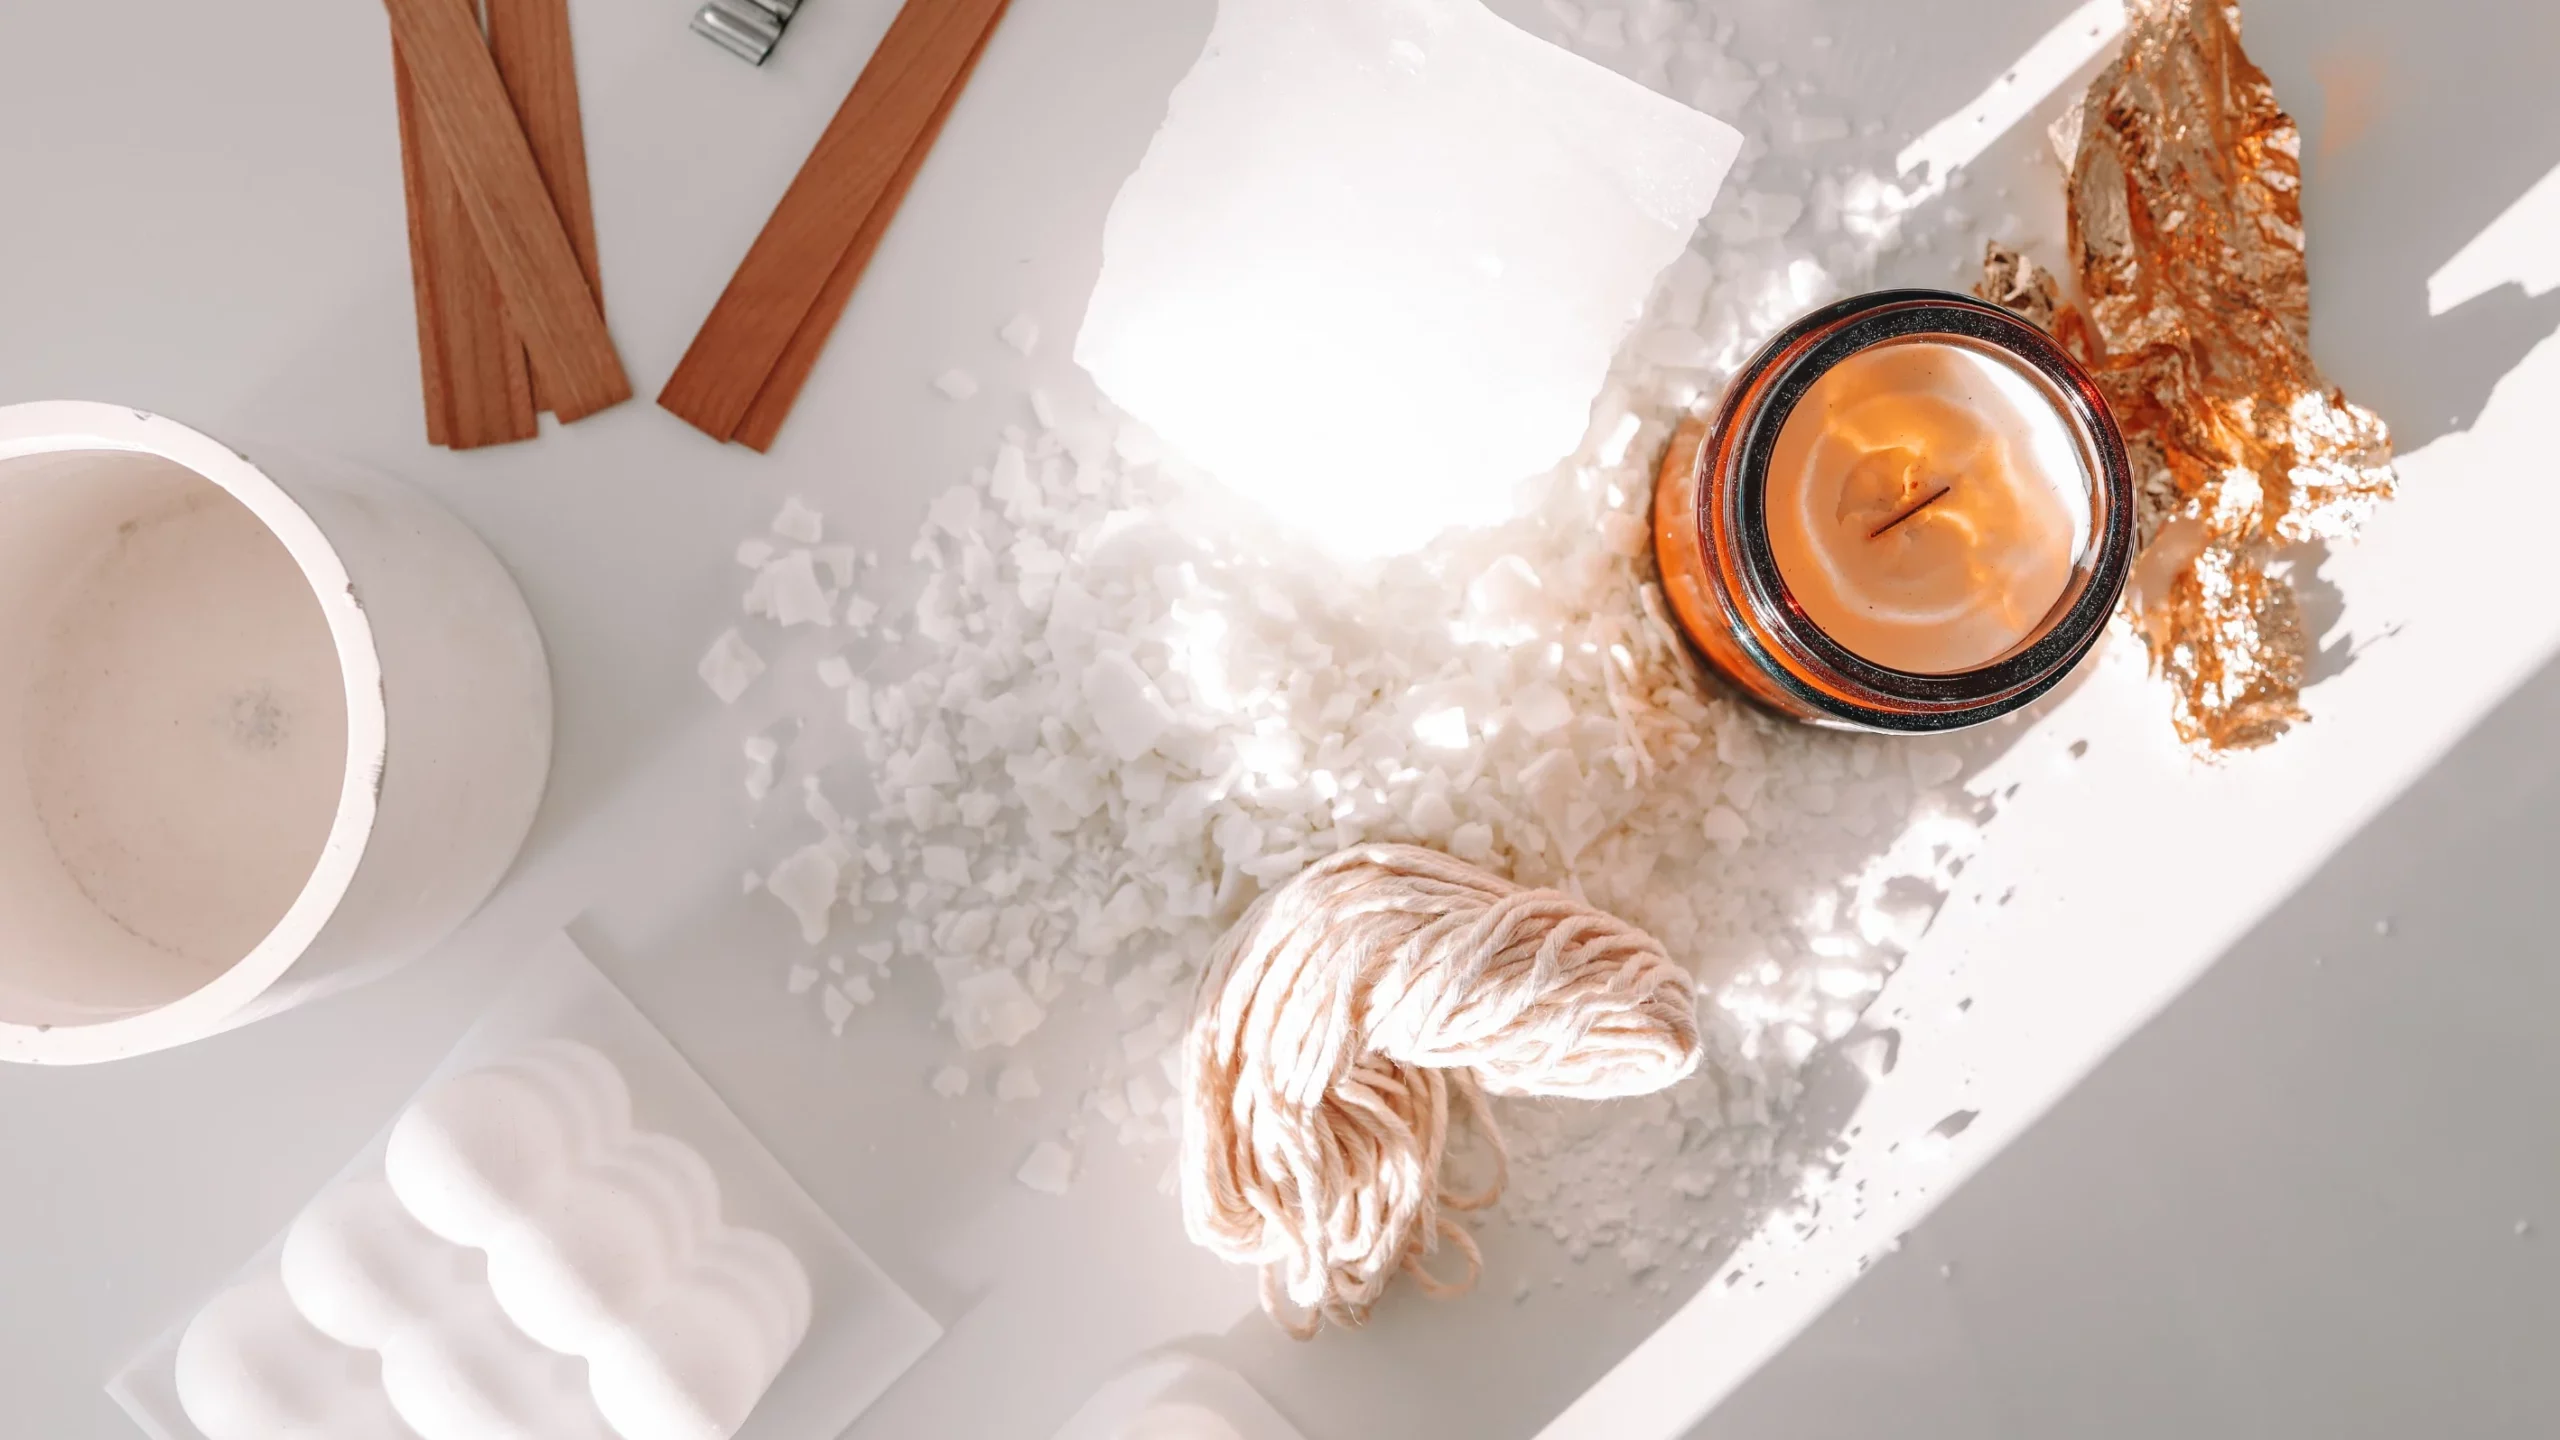
Before you start your candle making journey, it’s important to gather the essential supplies. These include wax, wicks, fragrance oils, dyes, containers, a thermometer, a pouring pot, a heat source, and various tools such as a stirring stick and a wick holder. Investing in high-quality supplies will ensure that you create candles that burn evenly and emit a beautiful fragrance. The type of wax you choose, whether it’s soy wax, beeswax, or paraffin wax, will greatly impact the quality and burn time of your candles.
Choosing the right wick size and material is also crucial in candle making. The wick determines how your candle burns, so selecting the appropriate wick for the type of wax and container you are using is essential. Fragrance oils and dyes allow you to customize the scent and color of your candles, adding a personal touch to your creations. With the right supplies and a creative mindset, the possibilities in candle making are endless.
Factors to Consider When Choosing Candle Making Supplies
Now that you understand the basics of candle making, let’s explore the factors you should consider when choosing your supplies.
When delving into the world of candle making, it’s essential to pay attention to the finer details that can elevate your craft to the next level. Beyond the basic considerations, there are additional factors that can make a significant difference in the outcome of your candles.
Quality of Supplies
The quality of your supplies will greatly impact the quality of your candles. Opt for supplies that are specifically designed for candle making and made from high-quality materials. Look for reputable brands that have a track record of producing superior products.
Consider exploring beyond the standard supplies and experimenting with unique additives like essential oils, dried flowers, or even glitter to add a personal touch to your candles. These extra elements can not only enhance the visual appeal of your candles but also create a unique sensory experience for anyone enjoying them.
Cost Considerations
While quality should be your top priority, it’s also important to consider your budget. Compare prices from different suppliers to ensure you’re getting the best value for your money. Keep in mind that cheap supplies may compromise the quality of your candles, so strike a balance between affordability and quality.
Additionally, consider the long-term cost efficiency of your supplies. Investing in high-quality tools like a reliable thermometer, precision scale, and heat-resistant containers may seem pricier initially but can save you money in the long run by ensuring consistent results and minimizing wastage.
Supplier Reputation
Choosing a reputable supplier is crucial to ensure you receive reliable and high-quality supplies. Read customer reviews and seek recommendations from experienced candle makers to determine the reputation of different suppliers. A reliable supplier will not only provide quality products but also offer excellent customer service.
Furthermore, establishing a good relationship with your supplier can open up opportunities for collaboration and customization. Some suppliers may offer bespoke solutions, such as creating custom fragrance blends or unique mold designs, to help you bring your creative candle ideas to life.
Detailed Overview of Candle Making Supplies
Now let’s take a closer look at the different types of supplies you’ll need for candle making.
When delving into the world of candle making, it’s crucial to understand the intricate details of the supplies at your disposal. From the type of wax to the fragrance oils and dyes, each component plays a vital role in creating the perfect candle.
Wax Types and Their Uses
There are several types of wax available, each with its own unique characteristics. The most common types include soy wax, beeswax, and paraffin wax. Soy wax is eco-friendly and produces a clean burn, making it a popular choice for environmentally conscious crafters. Beeswax, known for its natural honey scent and longer burn time, adds a touch of luxury to candles. On the other hand, paraffin wax is favored for its affordability and versatility, making it a go-to option for beginners experimenting with candle making.
Exploring the world of wax opens up a realm of possibilities, allowing crafters to tailor their candles to specific preferences, whether it’s creating a cozy ambiance or a refreshing atmosphere.
Importance of Choosing the Right Wick
The wick is an essential component of any candle, playing a pivotal role in how the candle burns and how well the scent is dispersed. Selecting the right wick involves considering factors such as burn time, self-trimming capabilities, and compatibility with fragrance oils. It’s crucial to choose a wick that matches the type of wax being used and the diameter of the container to ensure optimal performance.
With a myriad of wick options available, from cotton wicks to wooden wicks, each offering unique characteristics, finding the perfect match for your candle creation is a meticulous yet rewarding process.
Fragrance Oils and Dyes
Enhancing your candles with captivating scents and vibrant colors is made possible through fragrance oils and dyes. Selecting high-quality fragrance oils specifically designed for candle making ensures a long-lasting and pleasant aroma. When choosing dyes, it’s essential to opt for ones that are compatible with the type of wax being used and adhere to recommended usage rates to achieve the desired color intensity without compromising the candle’s performance.
Experimenting with different fragrance combinations and color schemes adds a creative dimension to candle making, allowing crafters to craft unique pieces that not only illuminate spaces but also evoke emotions and memories through scent and sight.
Where to Buy Candle Making Supplies in Australia
Now that you know what supplies you need, it’s time to find out where to buy them. Fortunately, there are several options to choose from in Australia.
When it comes to candle making supplies in Australia, the market offers a diverse range of options to cater to every crafter’s needs. Whether you are a seasoned candle maker or just starting out, the Australian market has something for everyone.
Online Stores for Candle Making Supplies
Online stores offer convenience and a wide selection of supplies. Popular online suppliers in Australia include Candle Supply, Aussie Candle Supplies, and N-essentials. These stores carry a comprehensive range of candle making supplies, making it easy to find everything you need in one place.
Shopping for candle making supplies online not only saves time but also provides access to a vast array of products that may not be available in physical stores. Additionally, online suppliers often offer detailed product descriptions and customer reviews to help you make informed decisions before making a purchase.
Physical Stores for Candle Making Supplies
If you prefer to see and touch the supplies before making a purchase, you can visit physical stores. Some popular brick-and-mortar stores in Australia that specialize in candle making supplies include Eroma, Shell Creek Candle Company, and The Candle Shack. These stores provide personalized assistance and allow you to get hands-on with the supplies.
Visiting a physical store for your candle making needs can be a sensory experience, as you can explore different scents, textures, and colors up close. The staff at these stores are often experienced in candle making and can offer valuable tips and recommendations based on your specific project requirements.
Tips for Storing Your Candle Making Supplies
Proper storage is essential to maintain the quality of your candle making supplies. Here are some tips to keep them fresh and usable.
Proper Storage for Waxes
Waxes should be stored in a cool and dry place, away from direct sunlight and extreme temperatures. Consider using airtight containers or ziplock bags to prevent moisture absorption. Label each container with the type of wax to easily identify them.
It’s also recommended to store different types of waxes separately to avoid any cross-contamination or mixing of scents. Be mindful of the shelf life of each wax variety and try to use older waxes first to ensure the best results in your candle making.
Keeping Your Wicks and Dyes Fresh
Wicks and dyes should also be stored in a cool and dry place. Keep them away from heat sources to prevent melting or discoloration. Consider using resealable bags or containers to keep them organized and easily accessible when you need them.
For wicks, it’s beneficial to store them in a way that prevents tangling or bending, as this can affect their performance during candle making. Dyes, on the other hand, should be kept in airtight containers to prevent them from clumping or losing their vibrancy over time.
By following these storage tips, you can extend the shelf life of your candle making supplies and ensure they remain in optimal condition for future use.
Now that you’re armed with the knowledge of choosing the best candle making supplies in Australia, you can embark on your candle making journey with confidence. Remember to prioritize quality, consider cost factors, and choose reputable suppliers for a successful and enjoyable candle making experience.
Related: 10 Creative Projects You Can Start with Beginner Candle Making Supplies


